Fold-Up Sewing Folio | Stitched Sewing Organizers Review

November 29, 2017

Oops.... Didn't mean to leave the blog empty for this long. I haven't been working on many blog-able projects lately with Christmas coming up. I'm not going to spoil Christmas-morning surprises for the sake of blog content!

I did sew something for myself recently. If you follow my Instagram feed, you will have seen that I'm totally hooked on English Paper Piecing and specifically hexies. I entered into this new sewing project slowly. I upgraded an Altoids tin with a pincushion to hold needles, some hexie pieces,  folding scissors, and thread for basting on the go. I quickly grew out of that solution. As I moved from basting to stitching rosettes, I needed a larger on-the-go hexie sewing catch-all. Around that time, I was also seeing photos from Aneela Hoey's new book all over social media. The cover project is the Fold-Up Sewing Folio. I immediately saw the potential for this folio to house all my EPP necessities.


I struggle to make anything without modification, so I made a few changes to the folio.

- I chose to piece the main "lining" section along the left foldline. As I was using scraps of my flamingo pajama fabric, I didn't want to waste it in the unseen lining of the flap pocket.
-The flap pattern piece as drafted has four facets, if that makes sense. Instead of a nice rounded flap it has three angles. I used a French curve to smooth this out into a neat curve which I think gives a much cleaner finish. And I didn't have to pivot at the points and poke them out.
-I extended the vinyl piece by about 1/2" so that it there would be less of a gap between the vinyl and top/bottom seams. I didn't like the look of the gap between the vinyl edges and the folio edges.
-Since I knew this would be a dedicated hexie-sewing accessory, I had to hexie-fy it. I used 1/2" hexies in the flamingo fabric to make a pincushion instead of the rectangle called for in the pattern. My pincushion is filled with crushed walnut shells and is detachable thanks to the inclusion of Velcro pieces on the folio and pincushion.
-Again, since I knew this would be for hexies, I decided to include a dedicated thread-holding solution in my folio. I use individual bobbins of my basting and stitching thread rather than carry full spools around. The plastic Handi-Bob I tacked in means that I can hold my bobbin in the folio and pull off a length of thread easily. I keep my spare bobbins in the flap pocket to switch out colors/types of thread as needed.
-As drafted, the body of the folio has a layer of medium-weight fusible interfacing and a layer of fusible fleece. This felt too "floppy" for me. I would rather have a sturdier base to work on and to shield my paper pieces from crushing when the folio was stuffed in a purse. I added a piece of Pellon 71F just to the center section of the folio. This gives great structure and helps the entire folio keep it's shape when closed.

Project Review:
I can say with certainty that this was a complete success. I've been using the folio for all my hexie sewing, inside or out of the house, for a few weeks now. The two zipper pouches are a good size to keep all my pieces and notions together. I've fit 15+ sets of hexie rosettes in the vinyl pouch with no issue. The Handi-Bob works like a charm. The only thing I would say is that the slip-pockets in the center-section are rather useless. I haven't found anything to keep in them that won't fall out if the folio is anywhere but flat on a table. I might replace the slip pockets with another zipper pocket if I made this again.


Book Review:
This is the first project I've made from the book but it won't be my last. The Folio is clearly the star, and there are a few projects that are almost throwaways (Needle Book, Tomato pincushion) but I think it's a good collection of projects for the beginner to intermediate seamstress.

The full-color photos are the best part of the book. And honestly they are a savior when sewing. The illustrations provided in-line with the instructions appear hand-drawn and lack some of the clarity I would hope to see in a published book. Luckily, the project instructions I've read through are not so complicated that you couldn't resolve any confusion with a good study of the project photos.

The pattern pieces are provided on a sturdy piece of paper. Tracing or photo-copying is required though as the paper is printed on both sides. However there really aren't many pattern pieces required as so many of the projects feature unpatterned rectangles.

Dress

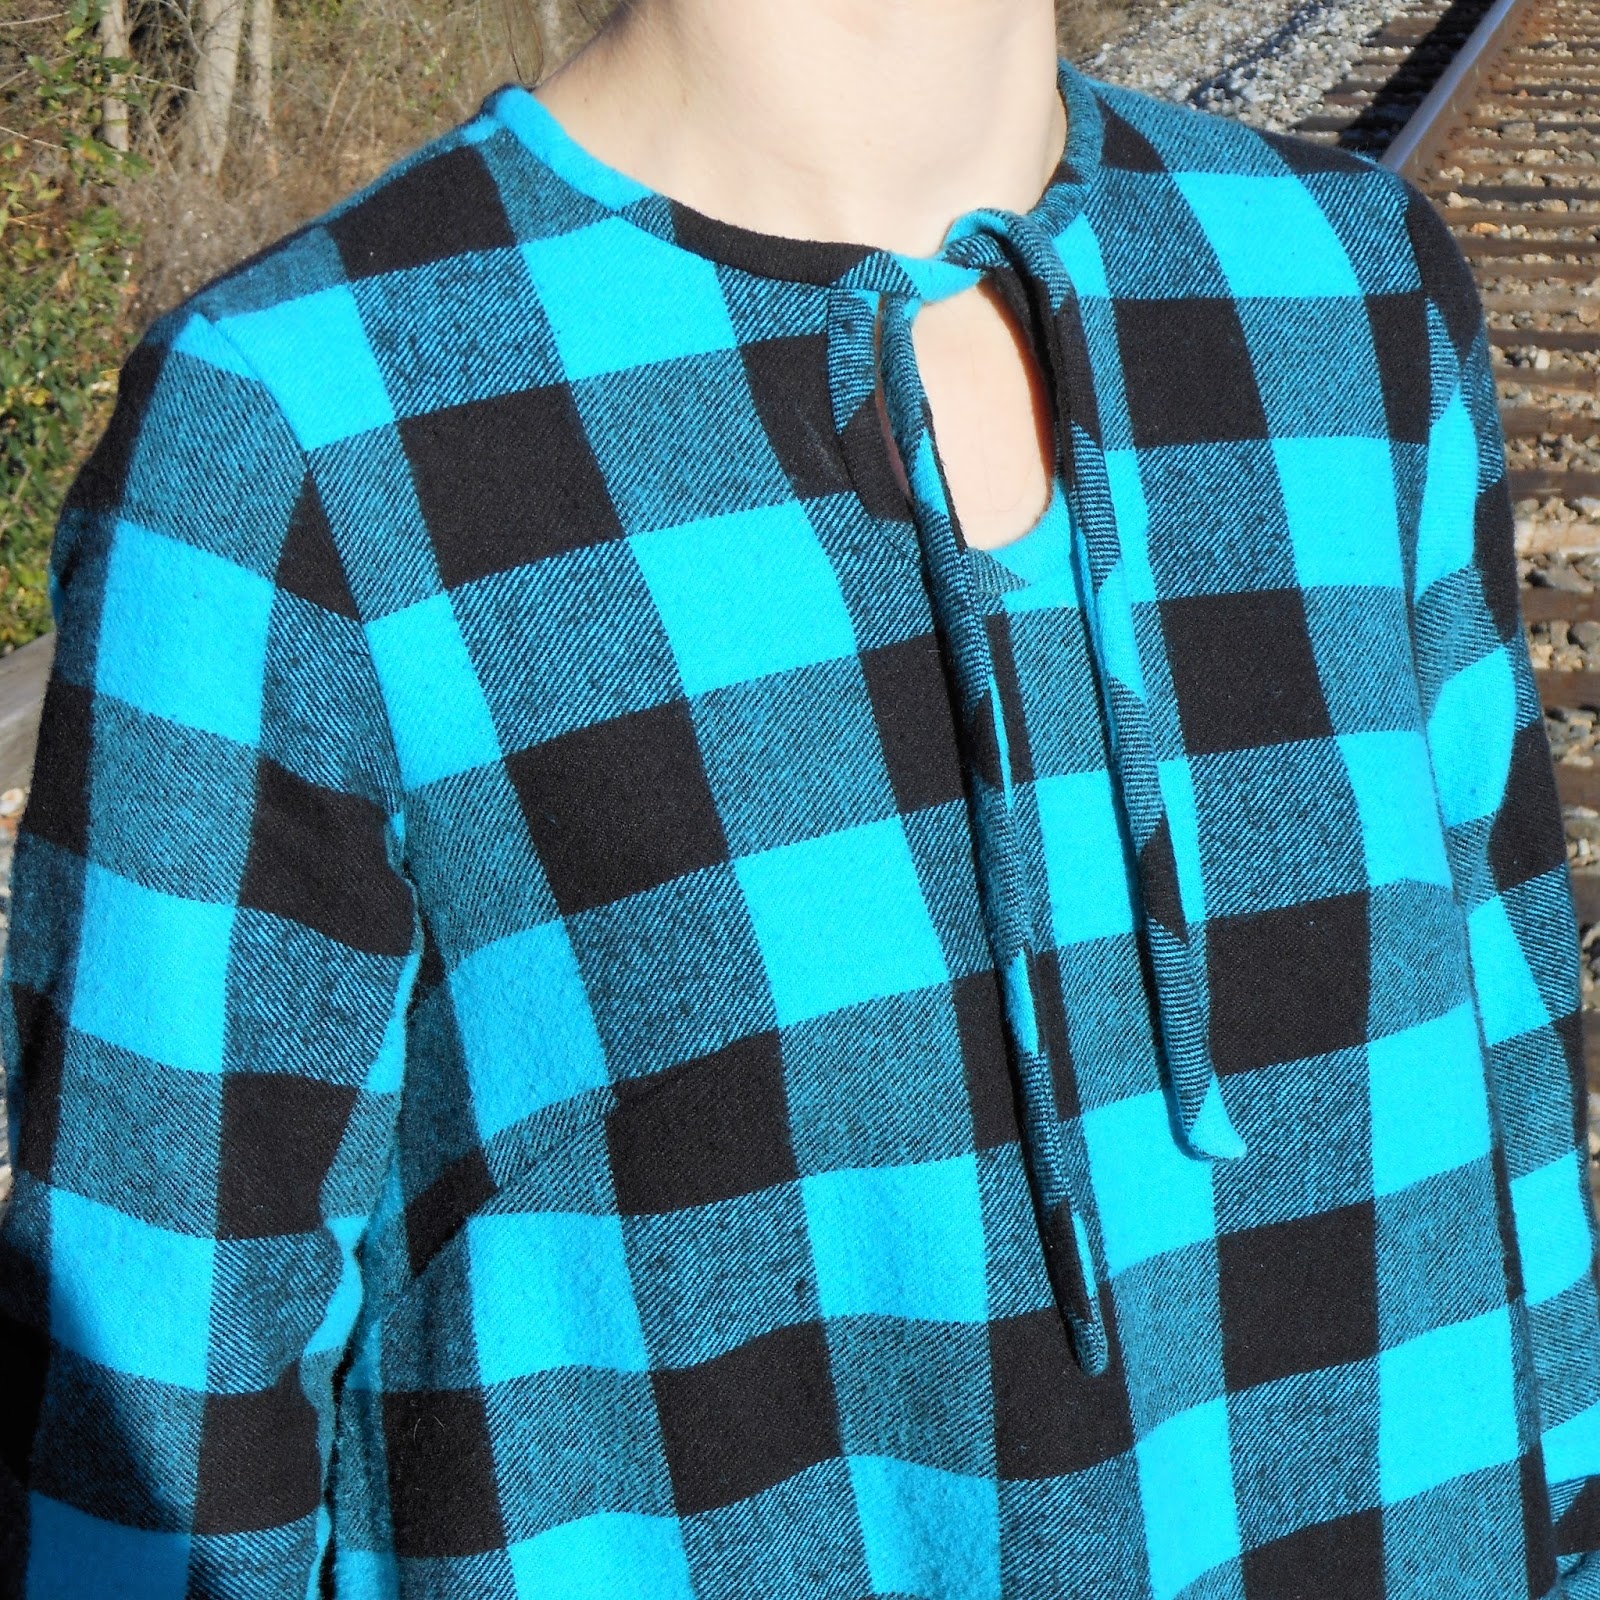
Buffalo Plaid Dress [Simplicity 8090/Vogue 9237 hack]

October 02, 2017

This dress came together from a number of different sources of inspiration. Current trends and garments/patterns that I've seen recently merged into one hack of a dress.
Inspiration, clockwise from top left: Jack Stitch Handmade's Vogue 9237,@nikidoesstuff_'s awesome shirt with tied sleevesErica's S8455 with tied sleeves and necklineCaroline's Marthe

I saw Erica's blouse post just as I was finishing up this dress. It was a total confidence boost that my design elements weren't off-track. Erica is always on top of the trends.

Jackie advised me that the Vogue pattern is very hack-able. I mean, it's an A-line dress with a butt ruffle. I couldn't justify spending $5 on a Very Easy Vogue pattern for that. And yes, I am calling that design feature on the back the "butt ruffle"
I started off with the Simplicity 8090 blouse pattern. It was the best pattern I could find in the stash with the right silhouette and sleeves. The envelope features a version in a large gingham which confirmed that the buffalo plaid would work with the style. Also, I've made it twice and I knew that the fit was okay. However, I did adjust the armscye and sleevehead based on fitting work I did for my yellow seersucker dress. And I extended the sleeve to bracelet-ish length. I also pivoted the dart up several inches. And of course I cut the back on the fold. No need to match more plaid than necessary.

From there, I extended the front to dress length. And I slightly increased the width of both front and back below the dart to make it even more trapeze-y.

The Buffalo Plaid: Surprising nobody, I didn't buy this fabric for this project but pulled it from the stash. Mom bought this a while ago for baby blankets, but she was graciously willing to sacrifice it since she already has a stock of baby quilts on hand. I had about 2 1/2 yards but it's only 45" wide and despite my best efforts there was no way to fit all my pieces on with the selvedges folded together. Instead I cut it all on the cross-grain. Crossing my fingers that I don't regret that later after multiple washes and wearings. I was able to cut the hems of the sleeves and butt ruffle on the selvedge edges, so I didn't need to finish them at all!

I don't think I've ever cut and matched a plaid like this before. I've done some gingham on a small scale, but matching this plaid was daunting. It sat on the cutting table for two weeks before I was brave enough to go at it with the scissors. I was surprised by how not-horrible the cutting process was. I cut the fabric one layer at a time, making sure to align my plaids before cutting the second layer. It turned out great, and my plaid-matching is better than I could have hoped for.


Keyhole neckline: I estimated the depth of the keyhole based on how wide I needed the neckline to be to fit over my head. I had sketched a line on my pattern tissue and ended up cutting it narrower, but I think I could have gone even narrower. The rest of the neckline is cut from 8090, with the binding stitched on top of the blouse's stitching line. All of the neckline is bound in 1 1/2" strips cut on the bias.


Sleeve ties: The sleeve ties are 1" wide finished, bias-cut. They are inserted into the sleeve seam, about 4" from the hem.

Butt Ruffle: The butt ruffle is about 60" long and 10" wide. That was the longest I could make it after cutting the front/back pieces from my limited yardage. The ruffle is just a rectangle, but since I cut a curve on the back I have a very slight mullet effect. Evenly distributing gathers is one of my least favorite sewing tasks. Soooo many pins.


Ultimately, I made a very comfortable, sorta trendy dress. I'm not usually one to hop on the trend-wagon quickly, but this works for me! Is it a better use for this fabric than a baby blanket? The jury is out. I have certainly reduced the cuteness potential.


Follow my blog with Bloglovin

PS: This totally counts as a #SewMyStashSeptember project. I bought nothing at all! Fabric, pattern, and all notions were from the stash! And I just barely finished it before the end of the month.

Bloglovin'

October 01, 2017


Follow my blog with Bloglovin
I've never used Bloglovin' before. I was devastated when Google Reader shut down and I've used Feedly since then. Please feel free to use whichever blog reader you prefer.

And if you're reading this purely administrative post, here's a sneak peek of my next post.


Popular Posts