Vintage Hooded Tee-Shirt Hack | McCall's 4322

February 24, 2018


I mentioned in my last tee-shirt post that I had a hack to share. This vintage pattern has been in the stash (My Grandmother's and then my Mother's. Which is now mine, too. I am not waiting to start using the stash!) since 1974. And it was used in 1974, or so I've been told. And it hasn't been touched since then. I put this pattern in the front of the "to make" box several months ago. The crossover hood is such a fun look, and the zigzag topstitching on the pattern illustration is a classic vintage embellishment. I briefly considered the collar option, but upon unfolding the massive pattern piece I decided it was best left in the 70s.


After I finished my last tee, I set my sights on this one. I'm not crazy about the body of this shirt (the paneled back and cut-on sleeves aren't really my style) but now I have a TNT pattern that I can substitute. It was surprisingly easy to graft the neckline of this pattern onto my self-drafted tee pieces.

I ran into a bit of a speedbump when I realized that I needed to cut 4 of the hood pieces (it's lined) rather than the 2 I had accounted for. There wasn't enough of my blue knit (a scrap from the stash), so I dug through the stash for an appropriate match. While a soft cream and paler blue were solid options, once I saw this tie-dye piece I knew I had to use it. Though pink isn't my color (See my last two posts), I hope that with it hidden in the hood it will still be wearable.

The body of the shirt came together easily. I serged the seams with a wooly nylon in the looper which helped immensely. If you look closely at the side seams of my pink tees, there's some pulling. That was resolved with the additional stretch provided by the thread. And I used the same wooly nylon in the bobbin of my domestic machine when twin-needling the hems and zigzagging the hood. The only thing I'm not crazy about with this tee is the fabric choice. The blue jersey doesn't have the same stretch as my last tee project, so it doesn't lay as nicely. You can see the pulling/wrinkling in the photo. In any case, it was so fun to make this shirt. And I'm still waiting to see if someone in the family has a photo of the 1974 version!

Mom and Me Dusters | New Look 6514

February 13, 2018


I don't want to brag about my fashion sense or anything, but I am a trendsetter. At least in my immediate family! Since we were taking photos of our pink shirts, I thought it would be a good time to finally get shots of our coordinating dusters. This might be a controversial opinion, but I don't think twenty-something is too old to have matching "Mommy and Me" outfits, haha!
I made myself a purple double-gauze duster last spring. As soon as I finished it and wore it to family functions (Mother's Day brunch, family graduations, etc) my mother decided she wanted to make one, too! I have shared my duster on Instagram a few times, but now that there are two of them in the family, I thought it was worth a full blog post to go over all of the details. It's amazing that even with the same fabric and pattern we put these dusters together so differently. With a simple pattern like this, it's a great opportunity to practice new techniques.


Pattern: New Look 6514 In lieu of a full review, I'll just say that this is a well-drafted pattern with plenty of ways to customize. Sizing is consistent for Big4 (I made a Small). The dartless design is great for a beginner, but the long stretches of narrow hemming could be a struggle for those without topstitching practice or if working with a lightweight material.

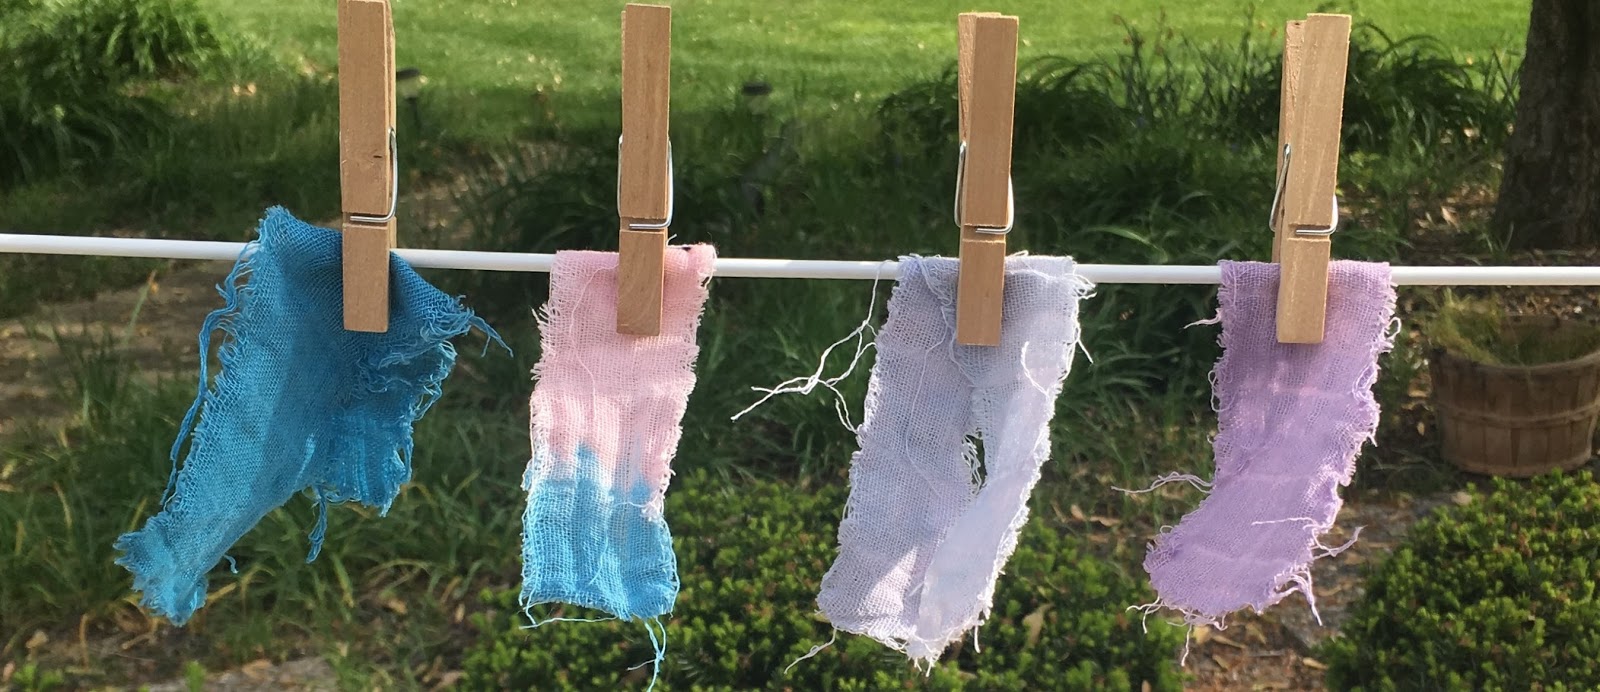
Fabric: We both started with a baby pink 100% cotton double-gauze. From Walmart, of all places! None of our local sewing shops were selling solid double gauze at the time (only nursery prints), and Walmart's color selection was limited to pink and blue. Neither of us are pink people. Mine was overdyed with a combination of RIT Aquamarine and Rose Quartz, and hers was a combo of Tangerine and Rose Quartz. I'm glad to have tested the dye process on swatches first, because getting the right color saturation was a challenge. FYI: I was just at Joann's this week and they have a lavender double-gauze on the shelf that is very similar to mine. If you haven't sewn with gauze, single or double, I highly recommend it for a cozy but breathable summer wardrobe staple. Just watch out for anything that's too sheer.


Cutting: I cut my back on the fold, she has a seam up the back. I re-drafted the hemline to be square across the front with a curved hem at the back. She cut the hem as drafted.
Assembly: We used different seaming methods, but because of the loose weave of the double-gauze all seams needed to be enclosed. Mom used French seams for the sleeve/side/back/shoulder seams and used bias tape to enclose the armsceye seam allowance. I used flat-felled seams for the side/shoulder seams and French seams for the sleeve/armsceye. They are both holding up well in the wash, while the raw yardage frayed horribly in the wash after dying.


Finishing: I cut 2" wide strips to finish the hem and front of my duster, and I cut my own one-piece neckline facing. These were stitched to the inside, turned, folded under, and topstitched to the outside. She put her neckline facing on the inside and used a narrow hem to finish the front and hem. As directed in the pattern. The narrow-hem is more lightweight so her duster is drapier.  The facings give mine more structure, particularly at the neckline.

Mom and Me Tee-Shirts (Basic InstincT T-shirt)

February 04, 2018


I've been interested in making my own basic cotton tees for a while now. I'm pretty happy with my RTW options (Land's End and J. Crew are my favorites) so it hasn't been at the top of the list. But last summer I came across some fantastic fabric at a garage sale. This Stretch & Sew kit was probably packaged in the 80s, but it included a yard and a half of high quality 100% cotton interlock and matching ribbing. Since sourcing the materials can sometimes be the hardest part of a project, I was lucky to find this.


When Sasha Secondopiano released her Basic Instinct T-Shirt pattern last fall, I thought it might be perfect to use with this kit. After printing and taping the PDF pattern, I compared it to my best-fitting RTW shirts and realized a problem straight away. The Basic Instinct tee is just not the fit that I was looking for. The shoulders are too broad, the sleeves too wide, the armhole too deep, and side seams too shaped. It's a beautifully drafted pattern, but not what I need for my TNT (Tried and True) everyday tee.
No problem, I just drafted my own pattern based off my favorite RTW tee. Tracing off the front and back were simple enough, but the sleeve took a bit more time. If you try this yourself, I found that pinning my pattern paper to the sleeve, all the way around, was very useful to identify where my pattern lines weren't quite matching the garment. Below, I have my flat pattern pieces compared to the Basic Instinct (outlined in blue). You should note that the Basic Instinct pattern is drafted with 3/8" seam allowance, but my kraft paper pieces have a 5/8" allowance, so there's another 1/4" in difference from what you see here. My shoulder and neckline are much narrower, the armhole is higher, the side is straighter, and the sleeve is slimmer.

With 1.5yds of my bargain fabric, I could easily cut two shirts. And, not willing to write off the Basic Instinct pattern entirely, I decided to get some shirt sewing practice by making one for my mother! I stitched up the two shirts assembly-line fashion after a quick basted fitting. I reinforced the shoulder and neckline seam with twill tape. The topstitching on the outside looks great, but it's not so tidy on the inside. Good enough for my first attempt though!
Me in my self-drafted tee
The neck ribbing piece for the Basic Instinct Tee was drafted perfectly, but it took me two attempts to get the neckline lying nicely on my self-drafted version.  I wish I had a coverstitch machine to easily finish the hem, sleeves, and neckline, but my domestic machine with a twin needle and wooly nylon on the bobbin worked just fine. I'll have to see if it holds up in the wash.

I'm quite pleased with how our shirts turned out! I have plans to "Garment Dye" my version (pink is not my color) and I have already hacked the pattern for another project you'll see soon.
Mom in her Basic Instinct tee
And to finish off, a few final notes about the Basic Instinct pattern. It is more oversized than I expected. I normally wear a Small, but even the XS in this pattern was a bit bigger than I'd like for an everyday tee. The sizing seems more like the unisex shirts you might get from a sports team or a men's undershirt.  I cut a M for Mom, and you can see it falls right off her shoulders. She wears M/L in RTW. I see this as more of a utility shirt, at least for my personal style. This might be the nicest gardening shirt my mother will ever wear. The pattern is drafted beautifully and I like that you can choose to print only the size you want. For a free pattern, this is very well done and a good option if you want to try out sewing knits.

Popular Posts